By David Averbach
Note: This Key Art series is intended for micro-budget filmmakers whose crew is not under a union contract. If your film’s crew is under an IATSE contract, you will need to abide by the rules regarding still photographers on set as forth by the union. We have been advised that there may be penalties involved by bringing an intern or PA in to shoot stills.
Yesterday, in Part 1 of this blog series, I discussed how relying solely on 1920×1080 pixel frame grabs was a bad idea if one wanted to create a poster that featured some sort of main image. In an ideal world, your entire film would be shot on a 5K camera, and you could pull as many frames from the footage as you wanted. That would be Plan A. But in the real world, many filmmakers emerge from their shoots with only 1080p frame grabs, and that’s not going to work.
Another problem is about marketing. During the chaos of a film shoot, filmmakers often forget to think about the art they might need to support a variety of possible marketing ideas and concepts, and are therefore left with fewer choices and placed in an ultimately weaker position vis à vis possible options on how to market their film without an expensive and inconvenient reshoot.
This blog series offers some concrete advice on how you can protect your film’s marketing future by adding a few inexpensive steps to your key art game plan.
A photographer on the set with a second 5K camera is great if you can afford it. That would be Plan B. But if your budget is limited (or even if it isn’t), last week I suggested a third plan—a “Plan C”—that as far as I’m concerned should be executed whether your film is entirely being shot on a 5K camera or whether there is a professional photographer on set or not. I’m sure I made some of you cringe by suggesting that you pick up a cheap but powerful point-and-shoot camera and putting an intern or production assistant in charge of shooting “hi-res scraps”—basically a lot of shots of the characters in various poses during the down time on a film shoot—that can be utilized down the line by a designer to execute the envisioned poster. The bottom line is this: as a designer myself, I’d rather have the opportunity to work with shots taken from a cheap but decent camera than nothing at all.
One of the reasons I suggested this is that while professional photographers undoubtedly bring a great deal of talent to a set, their exact skill set may not be entirely conducive to producing key art elements. A photographer’s eye for composition usually relies on what they see in bounds of their view-finder, and having them do some of the things that I’m going suggest here in Parts 2 & 3 of this key art blog series may cause a bit of pushback and confusion. It’s best to let them do what they usually do and concurrently (i.e. Plan C) have a go with the point-and-shoot/intern thing. Of course you don’t have to use a point-and-shoot camera if you have a better one available. But I work with a lot of filmmakers whom I feel would find an excuse not to do this if there were more work/more cost involved. And if you use an intern or a production assistant, or perhaps a rotate through a handful of them, you’re giving them something real to do, which will inspire them to do a better job in everything they are their to do for you. It’s a win-win. Have them take as many photos as they can. Just make sure you buy some extra high capacity compact flash cards.
Now onto Part 2…
You may have an idea of what you want your poster to look like even before you begin your film shoot. Great. But don’t plan for that to be the only idea you execute. You should produce the photos necessary to execute MANY ideas. Parts 2 and 3 of this series will try and help you sketch out some possible concepts.
Have a discussion about marketing before your shoot and come up with two dozen ideas. They don’t have to be all that specific. If your film involves one main character, or a pair of characters, then let’s assume for the moment that you could feature them in some way in terms of poster real estate…Accordingly, my first example will be to think a bit about how you could execute a concept that features a single image that takes up the entire poster. Again, you decide what that single image should be…perhaps it’s your main character. Perhaps it’s two characters. Perhaps it’s something else. But here’s the takeaway: at this stage, don’t produce a shot. Produce ELEMENTS.
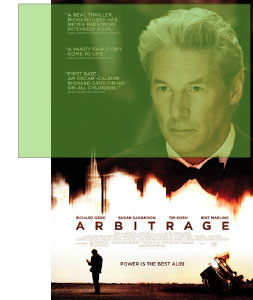
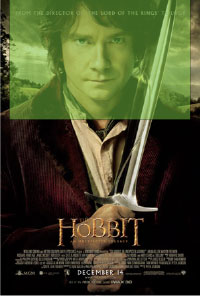
Let’s have a look at a few posters from current movies that involve a single shot. If these movies aren’t your taste, it doesn’t really matter…the concepts can be applied to almost anything or any style of poster.
 |
 |
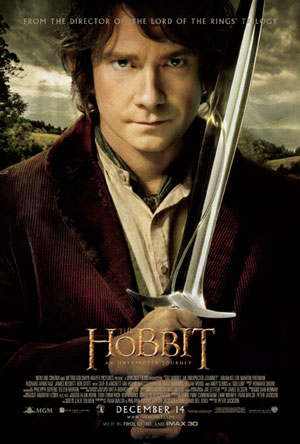 |
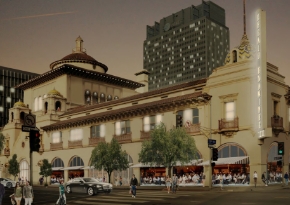
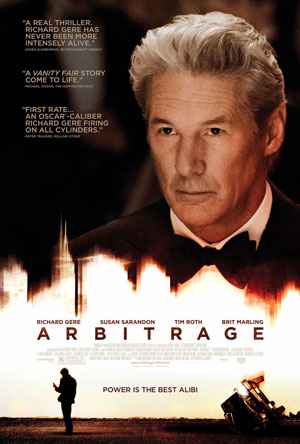
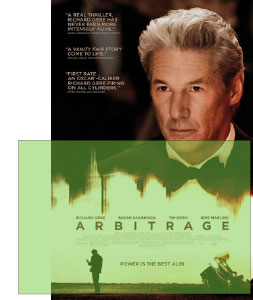
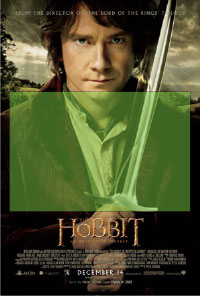
Looking at these posters closely in as full a resolution as I could find online, they have one thing in common: each image of the actor is a cutout placed in front of a different background from which the shot was taken. Artbitrage is the most blown-up…if you walk up to this poster in a theater and had a close look, I suspect, you’d see quite a bit of distortion. In The Hobbit, they’ve added a bit of noise to mask the upresing and blend it in with the colors of the bucolic background scene, but I suspect the picture was a much higher res to begin with. Gatsby remains the clearest photo, and the crispness works well with the art deco concept. A designer could create any of these looks with a photo of like the one of Leo DiCaprio, but it would be hard to create a Gatsby-like effect with the photo of Richard Gere.
In the absence of a large format camera in a studio environment, to get as full a resolution as possible, here’s what I suggest, and I know this is a bit unorthodox, but it’s pretty straightforward. Set up a white sheet as a background, or if your subject has a lot of fly-away hair, you may want to try it with a green or blue screen. (I found a cheap one here.) This will allow the designer to take away the background to produce a cutout. This is really no big deal for a graphic designer, unless there is a ton of hair involved, in which case, be sure to try it with a number of different backgrounds. This isn’t a shampoo ad, so shaving off a little hair is forgivable in this arena.
First, take a normal full body shot in portrait orientation just so there is at least one shot of the entire scene you are trying to capture.
But this shot will not be the one that is used. Instead, break the photo up into several shots…the trick is not to hold the camera in portrait orientation but keep it in landscape while you do this…then later on your designer reassemble them into a unified whole.
Why do it this way? Last week, I showed you what you can expect to achieve with a 16.1 megapixel camera:
![]()
Doing it this way will give you the most resolution to work with…
You may need to do it a few times to insure consistency in terms of lighting etc., but with the magic of photoshop, this shouldn’t be much of an issue. You’d want to be careful not to break the shot in the middle of any complicated parts, such as the person’s eyes or mouth, for example.
Start with the person’s face…make sure not to cut off the top of the head (even though two of heads in the posters here are cropped)…
 |
 |
 |
Then quickly lower the camera vertically and take another shot, so that the second overlaps just a bit, to get the upper part of the torso.
 |
 |
 |
Make sure to take dozens of shots like these, so that you have enough photographs to mix and match, as sometimes the pictures can vary in terms of lighting, or your hand is not in the exact position, etc. If there is a prop involved, I would not have that in the shot, but just have them grip something similar and photoshop the item (like a sword) back in later. (Remember to also take pictures of the prop using this technique.)
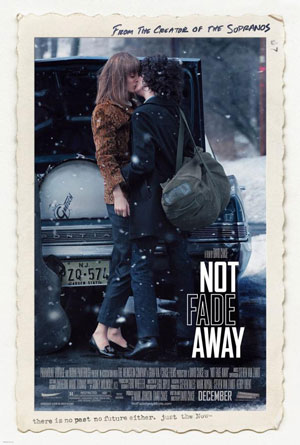
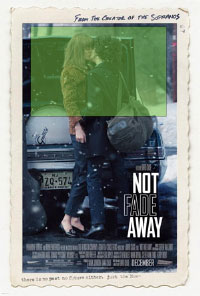
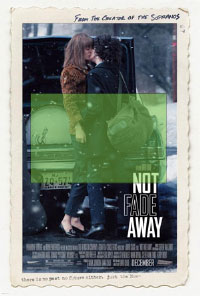
Perhaps you don’t want to feature just one character…after all, your film may not involve such a recognizable star as Richard or Leonardo. Let’s say you really want a particular shot of two of your main characters in some sort of pose. Like in the following film, Not Fade Away.
 |
 |
 |
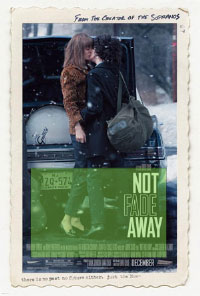 |
It is a bit counter-intuiative, but what I would do here is photograph the two characters in front of a solid background, not in front of the car. Then take a background photo (using the same technique here) of the car without the people. Then have your designer photoshop them together later. I would even go a step further and take a picture of the car without its background, and then take the trees as a separate photo. You never know how the composition will work best with your title treatment, or in different orientations (have a look at key art that is modified for a landscape orientation in iTunes trailer art…you’ll want to be able to move things around to create the look you want in the space that is allotted).
The point is that you are producing elements, not photos. Therefore, don’t just do this type of work for your actors/characters. Do it for your locations as well. You never know what background you may want to use, and the more shots you take, the more options you will have.
Of course, all this requires thinking ahead. But you will be glad you did.
Next week, in Part 3, I’ll offer a few more concepts that should be on every filmmaker’s key art concept list.
David Averbach is the Creative Director of The Film Collaborative and handles all internal design work for the company. With over 15 years of experience in graphic marketing, graphic design, database design and web design, David’s skill set combines a strong sense of visual design with a knack for problem-solving.